
Calculating the Feasibility #
The first step in planning larger workflows is to check if the control-points (and way-points) of each path are reachable at all. This step is optional, but it makes sense to do before trying to plan an impossible tasks.
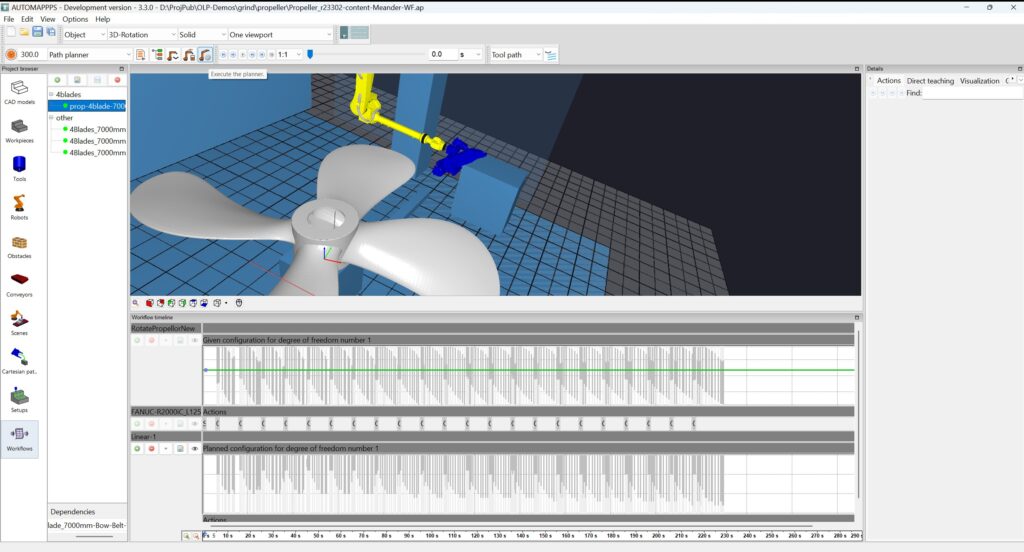
The image above shows a desired result of the feasibilty map. The upper graphics does show horizontally the time, the vertical axis of the graph is the range of the rotation table (upper: RotsatePropellerNew) and the range of the linear external axis the robot is attached to (lower: Linear-1). In the upper graphics, the grey bars show the range of the rotation of the rotation table each control-point of the path is reachable and the green line shows the currently defined rotation value of the rotation axis which rotates the part. In the lower graphics, the grey bars show the range of the motion of the linear axis, each control-point of the path is reachable – depending on the given value of the rotation table, i.e. the green line. Changing the rotation of the (upper) rotation table has tremendous impact on the feasibility map of the linear axis. Changing the otation of the (upper) rotation table let the bars of the linear axis grow, shrink or vanish (i.e. the control-point can never be reached), or shift them up or down, or split them into separate small bars (indicating a singularity, reconfiguration or similar).
How to get there is described in the following:
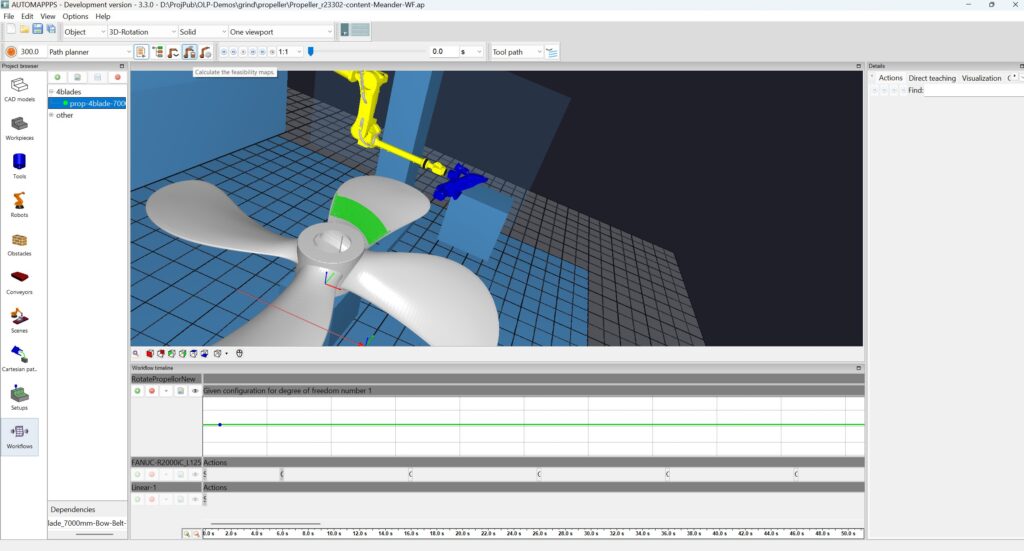
Step one: For large workflows with plenty of actions and control-points, it makes sense to initally test one action / one paths only. Therefore select all but one action (left mouse-click for the first action to be selected, with <SHIFT> for the last action to be selected. Select “Disable” in the pop-up menue (right mouse click).
Then press “Calculate the feasibility maps” (upper part of the screen).
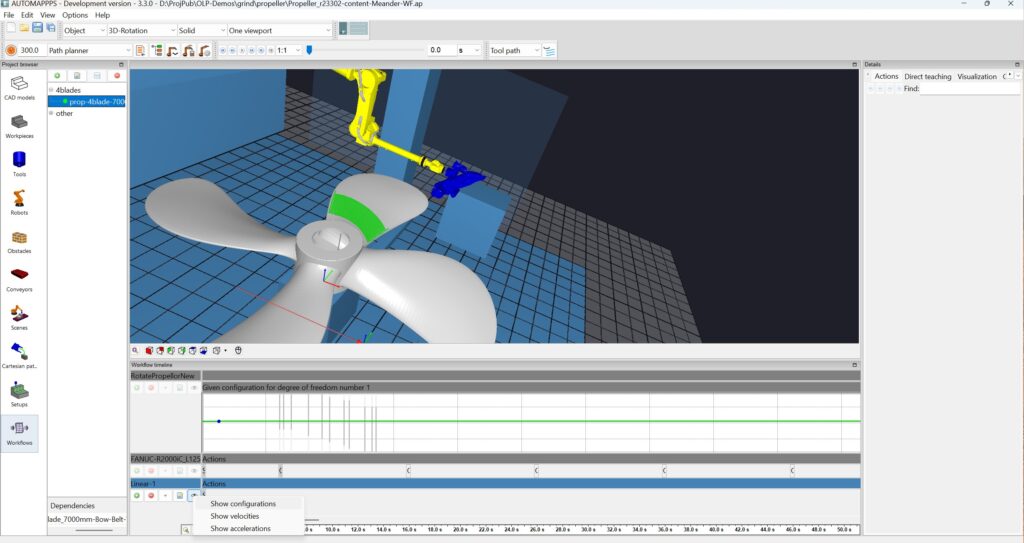
The result of the feasibilty map is shown above. In principle all control-points and way-points of the selecte first action are reachable with the initial chosed rotation of the rotation table. In order to see how easy or complex the robot with the external axis can reach it, activate “Show configuration” also for the external axis (Linear-1)
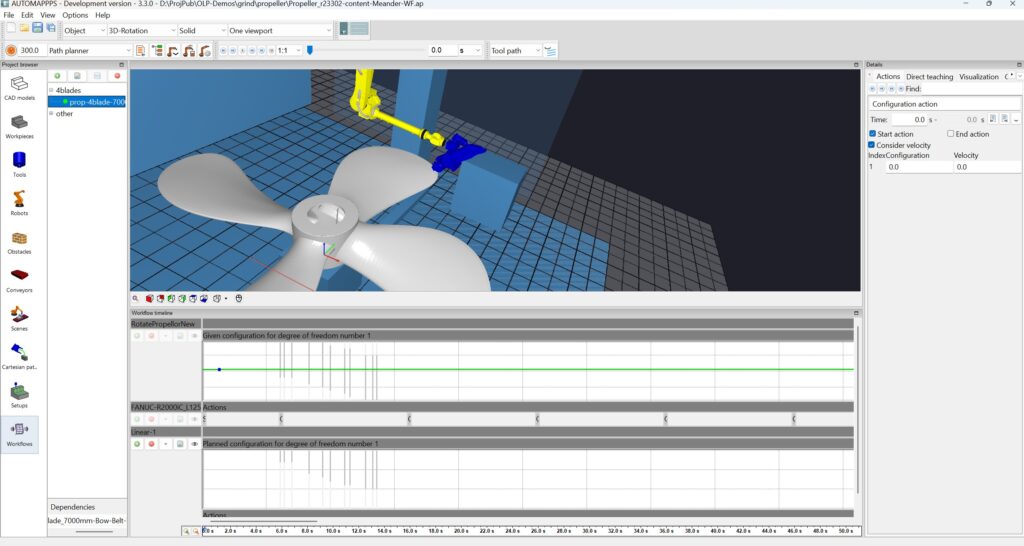
The result is promissing. Reaching the first control-points of the path however requires the linear axis to move quite far. We will check later if we can improve that – but it needs to be improved for all actions.
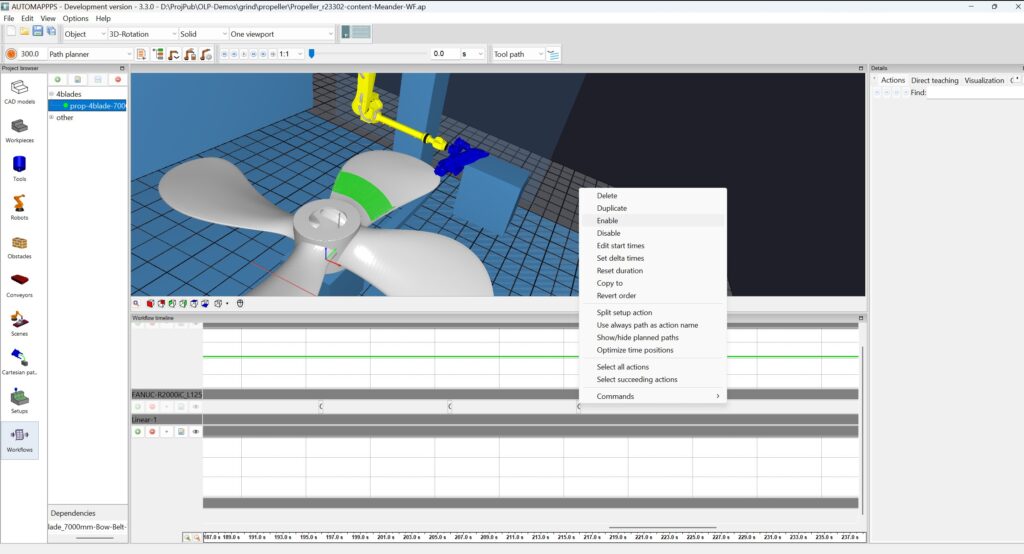
Select all actions assigned to the robot and “Enable” the actions again.
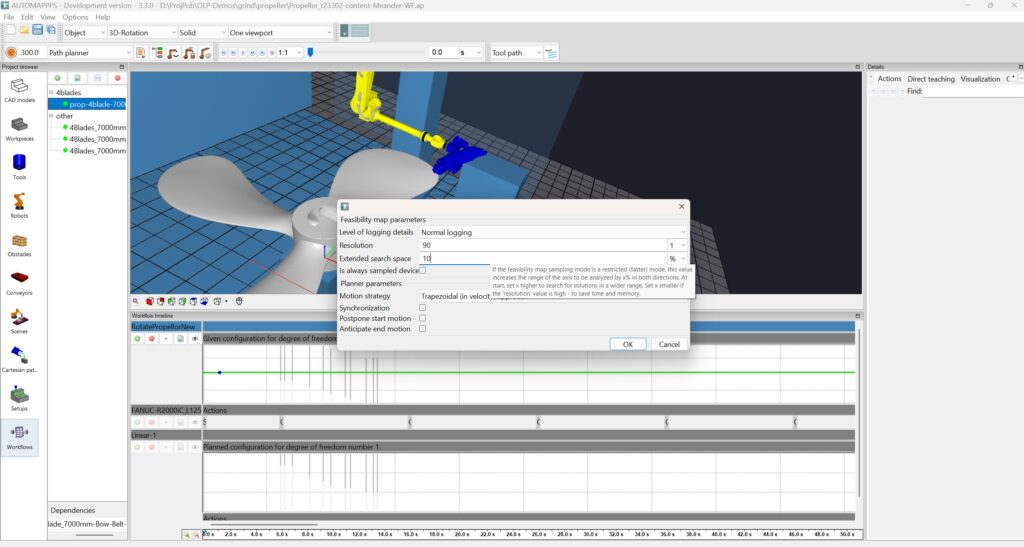
Check the resolution of the external axis and rotation table. We do know by interpreting the Feasibilty Map that reaching the all control-points may not be trivial. For the rotation table, which can rotate +-90 degree, we increase the sampling from 18 (all 10 degrees) to 90 (all 2 degrees) and limit the search space to +- 10%. Note, limiting the search space is only applied after you switch in the planner parameter from “Full feasibilty map sampling” to “Reduced feasibilty map sampling” or “Minimal feasibilty map sampling”. (not done yet in this example)
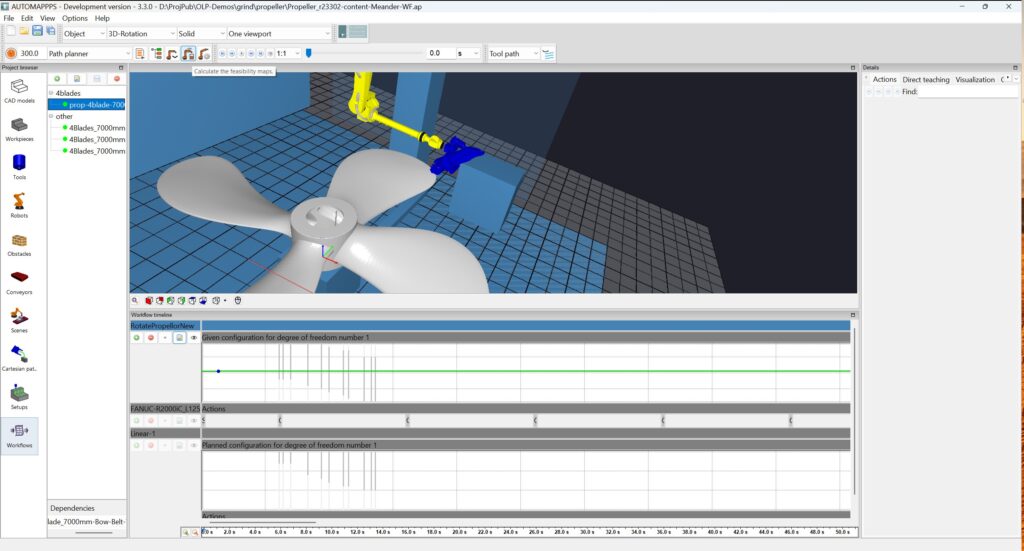
Press “Calculate Feasibilty Maps” again.
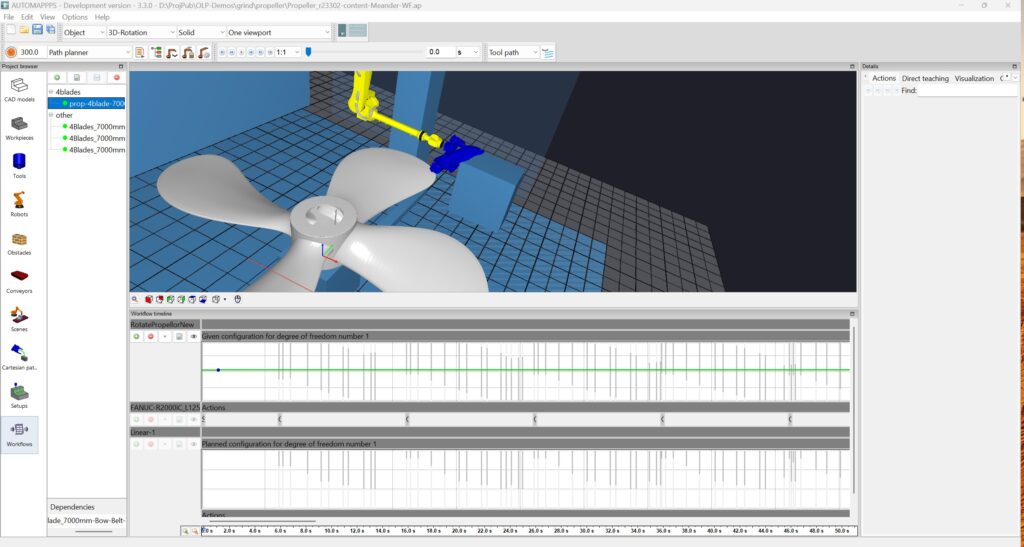
The above image shows the result of the feasibilty map for all actions.
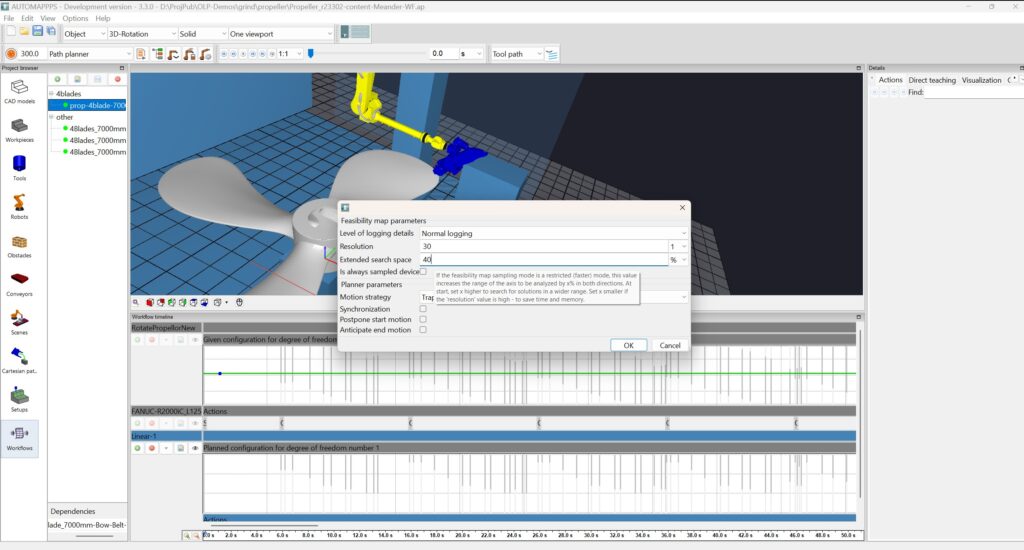
Since the above maps are a bit coarse for the external axis, increase the resolution from 16 to 30 (the axis is 3m long, so sampling now is all 10cm). The extended search space should be 40 or 50% since this axis is not defined manually as the rotation table, but the planner needs to search for a solution.
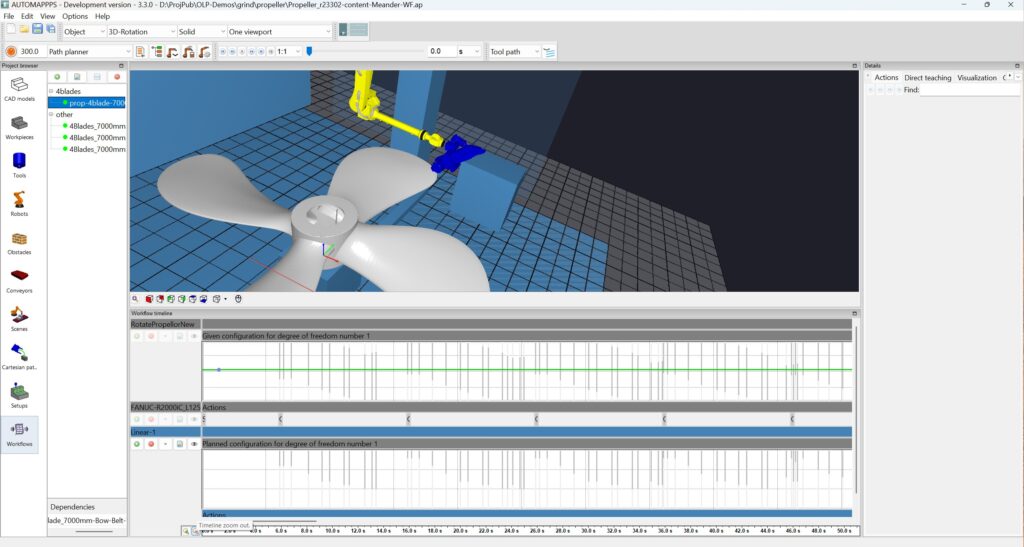
Result after Feasibility map calculation.
Planning #
Since the feasibilty map looks OK, you do not need to change the rotation value of the rotation table to increase reachabilty.
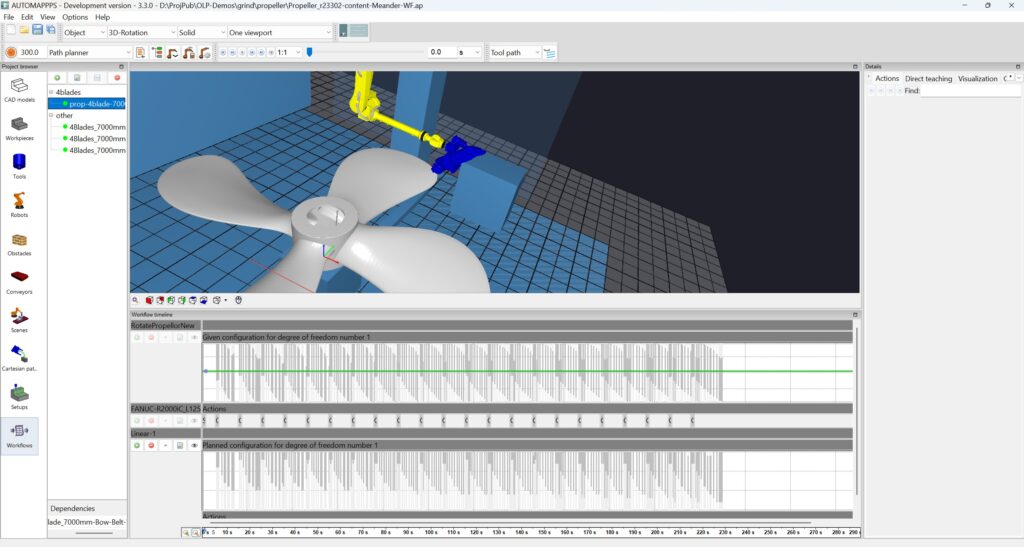
Simply press “Execute the planner”.
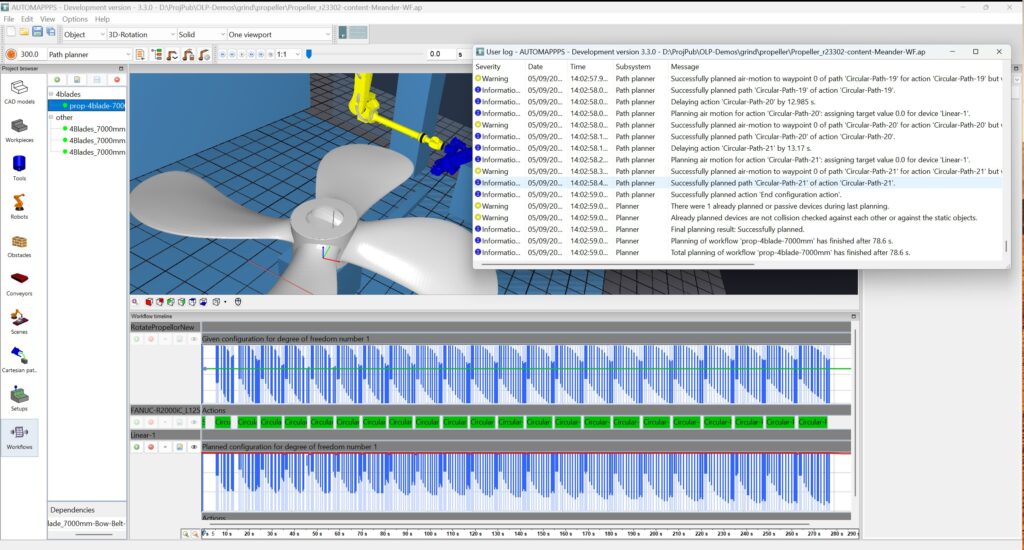
Result after successful automatic robot motion planning. All actions are marked green. No errors are reported in the log-file.


